用SpringCloud Alibaba搭建属于自己的微服务(八)~基础搭建~springboot整合swagger接口文档
本文共 5781 字,大约阅读时间需要 19 分钟。
一.概述
swagger接口文档是根据我们编写的controller自动生成,我只需要在接口上加上特定的注解,启动服务后,就直接可以在web页面上进行接口的调试.
二.springboot整合swagger
1.pom依赖
(1).ccm-mall.pom的 <dependencyManagement/>中加入以下依赖,声明版本号.
io.springfox springfox-swagger2 2.9.2 io.swagger swagger-models io.springfox springfox-swagger-ui 2.9.2 io.swagger swagger-models 1.5.21
(2).server.pom中加入以下依赖,实际引入
io.springfox springfox-swagger2 io.swagger swagger-models io.springfox springfox-swagger-ui io.swagger swagger-models
2.代码配置
(1).springboot启动类上加@EnableSwagger2注解,代表开启swagger接口文档.
package com.ccm.server.user;import com.baomidou.mybatisplus.extension.plugins.PaginationInterceptor;import org.mybatis.spring.annotation.MapperScan;import org.springframework.boot.SpringApplication;import org.springframework.boot.autoconfigure.SpringBootApplication;import org.springframework.context.annotation.Import;import springfox.documentation.swagger2.annotations.EnableSwagger2;/** * @Description server-user服务启动类 * @Author ccm * @CreateTime 2020/07/03 14:04 */@EnableSwagger2@MapperScan(basePackages = "com.ccm.server.user.dao.mysql.mapper")@SpringBootApplication //声明为一个启动类@Import(value = PaginationInterceptor.class)public class ServerUserApplication { public static void main(String[] args) { SpringApplication.run(ServerUserApplication.class,args); }} (2).新建swaggerConfig配置类.
package com.ccm.server.user.config;import org.springframework.context.annotation.Bean;import org.springframework.context.annotation.Configuration;import springfox.documentation.builders.ApiInfoBuilder;import springfox.documentation.builders.PathSelectors;import springfox.documentation.builders.RequestHandlerSelectors;import springfox.documentation.service.ApiInfo;import springfox.documentation.spi.DocumentationType;import springfox.documentation.spring.web.plugins.Docket;/** * @Description ccm * @Author ccm * @CreateTime 2020/7/8 17:38 */@Configurationpublic class SwaggerConfig { @Bean public Docket createRestApi() { return new Docket(DocumentationType.SWAGGER_2) .apiInfo(apiInfo()) .select() .apis(RequestHandlerSelectors.basePackage("com.ccm.server.user.controller")) //swagger接口扫描包 .paths(PathSelectors.any()).build(); } private ApiInfo apiInfo() { return new ApiInfoBuilder().version("1.0.0") .title("欢迎") .description("光临") .termsOfServiceUrl("www.baidu.com") .build(); }} 三.测试
1.代码内容
(1)SwaggerTestController.java
package com.ccm.server.user.controller;import com.ccm.server.user.controller.req.SwaggerTestReq;import com.ccm.server.user.controller.vo.SwaggerTestVO;import io.swagger.annotations.Api;import io.swagger.annotations.ApiOperation;import io.swagger.annotations.ApiParam;import org.springframework.web.bind.annotation.*;/** * @Description swagger整合测试 * @Author ccm * @CreateTime 2020/07/08 17:00 */@RestController@RequestMapping(value = "swagger-test")@Api(tags = "swagger测试")public class SwaggerTestController { @ApiOperation(value = "rest风格接口测试之get请求") @GetMapping public SwaggerTestVO get(@ApiParam(value = "id",required = true) @RequestParam Long id) { SwaggerTestVO swaggerTestVO = new SwaggerTestVO(); swaggerTestVO.setId(1L); swaggerTestVO.setName("zhouzhiwu"); return swaggerTestVO; } @ApiOperation(value = "rest风格接口测试之post请求") @PostMapping public SwaggerTestVO post(@RequestBody SwaggerTestReq swaggerTestReq) { SwaggerTestVO swaggerTestVO = new SwaggerTestVO(); swaggerTestVO.setId(1L); swaggerTestVO.setName("zhouzhiwu"); return swaggerTestVO; } @ApiOperation(value = "rest风格接口测试之put请求") @PutMapping public SwaggerTestVO put(@RequestBody SwaggerTestReq swaggerTestReq) { SwaggerTestVO swaggerTestVO = new SwaggerTestVO(); swaggerTestVO.setId(1L); swaggerTestVO.setName("zhouzhiwu"); return swaggerTestVO; } @ApiOperation(value = "rest风格接口测试之dele请求") @DeleteMapping public SwaggerTestVO delete(@ApiParam(value = "id",required = true) @RequestParam Long id) { SwaggerTestVO swaggerTestVO = new SwaggerTestVO(); swaggerTestVO.setId(1L); swaggerTestVO.setName("zhouzhiwu"); return swaggerTestVO; }} (2).SwaggerTestReq.java
package com.ccm.server.user.controller.req;import io.swagger.annotations.ApiModel;import io.swagger.annotations.ApiModelProperty;import lombok.Data;/** * @Description swagger测试入参实体 * @Author ccm * @CreateTime 2020/07/08 17:01 */@ApiModel(value = "swagger测试入参实体")@Datapublic class SwaggerTestReq { @ApiModelProperty(value = "id") private Long id; @ApiModelProperty(value = "姓名") private String name;} (3).SwaggerTestVO.java
package com.ccm.server.user.controller.vo;import io.swagger.annotations.ApiModel;import io.swagger.annotations.ApiModelProperty;import lombok.Data;/** * @Description swagger测试出参实体 * @Author ccm * @CreateTime 2020/07/08 17:01 */@ApiModel(value = "swagger测试出参实体")@Datapublic class SwaggerTestVO { @ApiModelProperty(value = "id") private Long id; @ApiModelProperty(value = "姓名") private String name;} 2.启动服务
3.访问 localhost:1000/swagger-ui.html
(1)
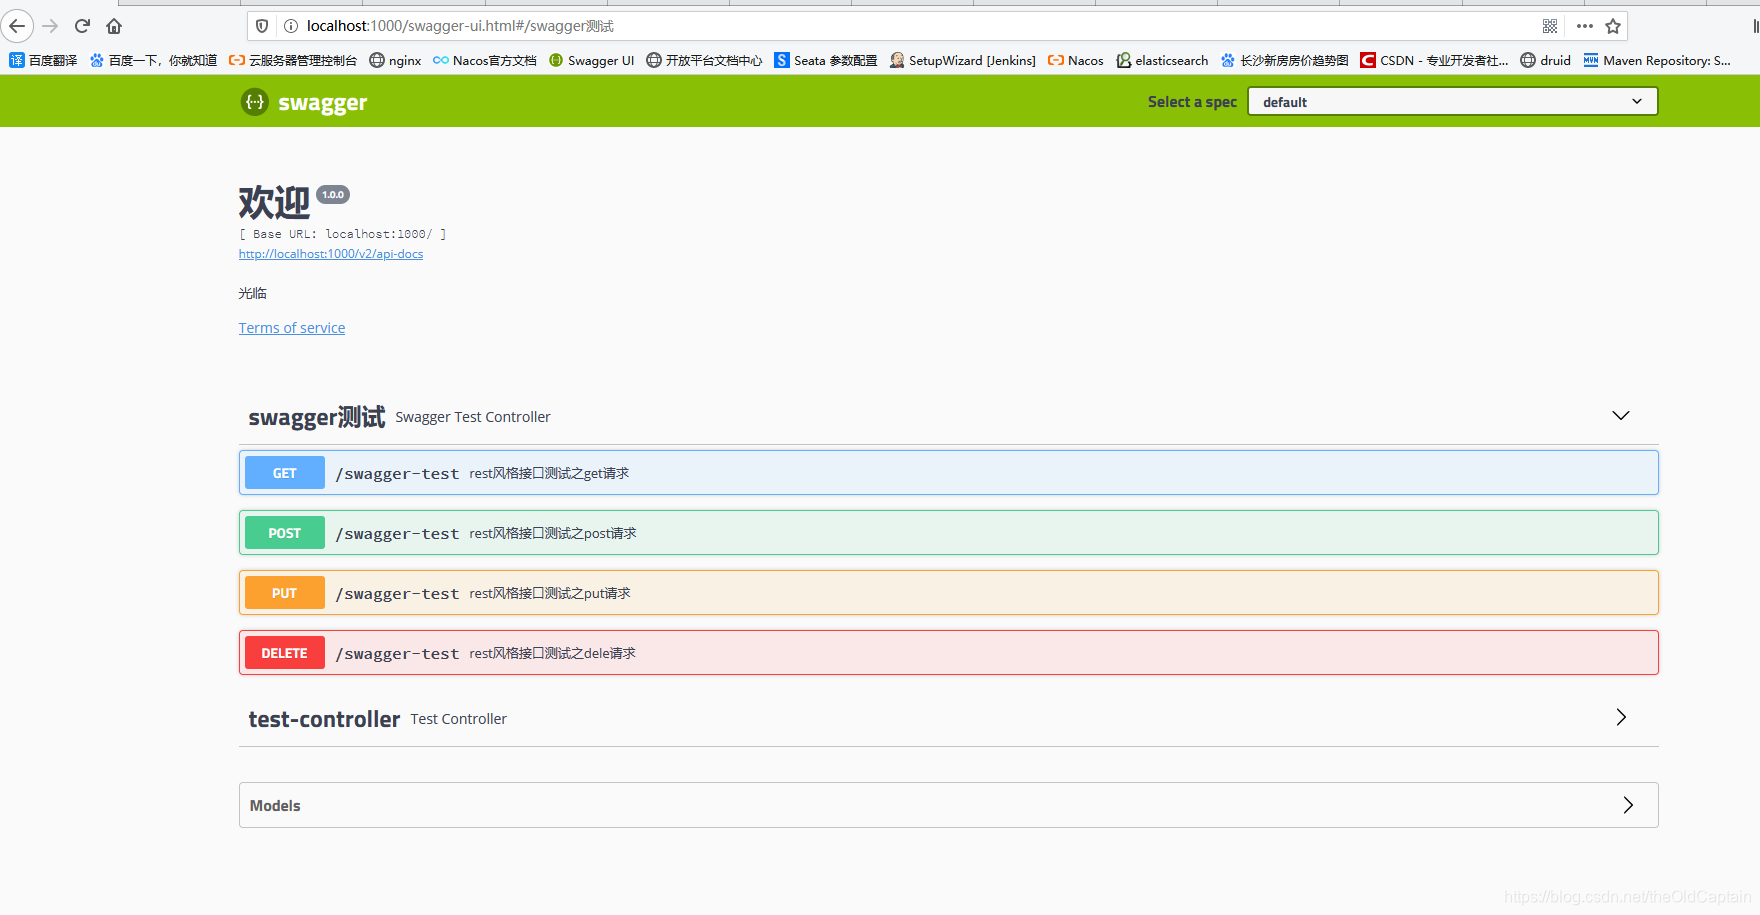 (2)调用一个接口试试.
  访问成功.
访问成功. 源码地址:
您的点赞、收藏、转发和关注是我持续创作的动力!
转载地址:http://kktli.baihongyu.com/
你可能感兴趣的文章
用LoadRunner开发开心网外挂
查看>>
QTP测试.NET控件CheckedListBox
查看>>
使用QTP的.NET插件扩展技术测试ComponentOne的ToolBar控件
查看>>
用上帝之眼进行自动化测试
查看>>
为LoadRunner写一个lr_save_float函数
查看>>
PrefTest工作室全新力作-《性能测试与调优实战》课程视频即将上线
查看>>
质量度量分析与测试技术 培训大纲
查看>>
欢迎加入【亿能测试快讯】邮件列表!
查看>>
为什么我们的自动化测试“要”这么难
查看>>
LoadRunner性能脚本开发实战训练
查看>>
测试之途,前途?钱途?图何?
查看>>
测试设计与测试项目实战训练
查看>>
HP Sprinter:敏捷加速器
查看>>
单元测试培训PPT
查看>>
adb常用命令
查看>>
通过LR监控Linux服务器性能
查看>>
通过FTP服务的winsockes录制脚本
查看>>
LRwinsocket协议测试AAA服务器
查看>>
Net远程管理实验
查看>>
反病毒专家谈虚拟机技术 面临两大技术难题
查看>>